How I manage my LaTeX lecture notes
Over the past few years, I’ve been developing an efficient way to structure and organize my LaTeX lecture notes. In this blog post, I’ll explain my current solution. I’ve talked about taking notes and drawing figures before, which makes this the third post in a series explaining my note taking setup.
File structure
Let’s first talk about the file structure of my lecture notes. Currently, it’s organized as follows:
- university
- bachelor-1
- bachelor-2
- bachelor-3
- semester-1
- semester-2
- preamble.tex
- complex-analysis
- object-oriented-programming
- …
- current-course -> complex-analysis
As you can see, fairly self-explanatory, but two things are worth expanding upon: preamble.tex and current-course.
Shared preamble
All courses in the same semester share a common preamble. It contains frequently used packages, macros and environments; you can find the latest version on Github. Each semester, I review this preamble and remove stuff I don’t use any more.
Sharing this preamble between multiple courses minimizes context switching. For example, I never have to think whether or not I’ve already added a
theoremenvironment in the preamble of a particular course. Once I’ve added it to the shared preamble, I know it’s accessible in all my notes, at any time.Keeping track of the current course
The second thing that’s worth talking about is current-course, which is located at the root of the file structure:
- university
- current-course -> complex-analysis
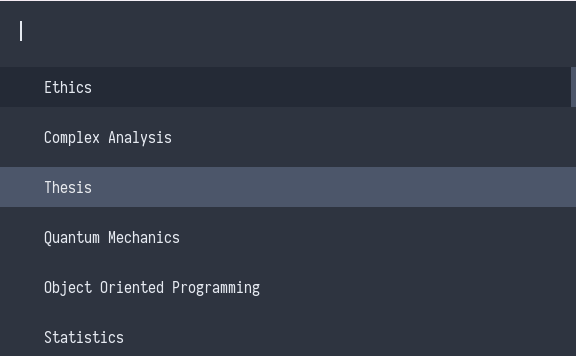
While it functions like a directory, current-course is actually a symbolic link that points to a course directory, in this case complex-analysis. It represents the current course I’m working on: be it taking notes during a lecture or writing an assignment. Which course is active automatically changes based on my schedule — more on that later — but I can also change it manually when necessary. Pressing Alt+S opens the following dialog:
Selecting an item updates the destination of the symbolic link, which in turn means I now have a whole bunch of keyboard shortcuts at my disposal. For example, pressing Alt+O opens my compiled LaTeX notes by simply executing
zathura current-course/master.pdf. Likewise, Alt+R opens the course directory in a file browser, Alt+J in a terminal, Alt+M opens the LaTeX source code in Vim, etc. These shortcuts are all global, which means that I can use them in any context, whenever I want. To configure them, I’m using the Simple X HotKey Daemon, or ‘sxhkd’ for short.Besides these few simple shortcuts, I’d like to share some more interesting ones as well, but before I can explain them, I first need to talk about the structure of a course.
Course structure
Generally, the structure of a course looks as follows:
-
complex-analysis
- info.yaml
- master.tex
- lec_01.tex
- lec_02.tex
- …
- lec_13.tex
- figures
- argument-principle.pdf
- argument-principle.pdf_tex
- argument-principle.svg
- …
- UltiSnips
- tex.snippets
In what follows, I’ll go over each of the files and directories explaining their function.
1. Course properties: info.yaml
The first item that’s on the list is a file that contains information about the course: info.yaml. It’s a simple yaml file whose content is structured as follows:
title: 'Complex Analysis'
url: 'https://university.com/toledo?course_id=827278'
short: 'CA'
To retrieve a property of this file, I use the command line utility yq. For example, to get the url of the current course, I can simply execute:
$ yq read current-course/info.yaml url
https://university.com/toledo?course_id=827278
Now it’s quite easy to create a shortcut that opens the url in my browser:
$ firefox "$(yq read current-course/info.yaml url)"The
titleattribute is used for generating the course selection dialog I’ve discussed before, and theshortformat is used as an indicator in my status bar to show which course is active.2. Bundling up lecture notes: master.tex
Secondly, each course has a master.tex file which bundles up individual lecture notes. I can press Alt+M to open it up in Vim:
\documentclass[a4paper]{report}
\input{../preamble.tex}

\DeclareMathOperator{\length}{length}
\DeclareMathOperator{\Aut}{Aut}
\DeclareMathOperator{\diam}{diam}
\DeclareMathOperator*{\res}{res}
\title{Complex Analysis}

\begin{document}
    \maketitle
    \tableofcontents
    % start lectures
    \input{lec_12.tex}
    \input{lec_13.tex}
    % end lectures
\end{document}
The file starts with the inclusion of the shared preamble and after that, the preamble of the course follows which consists of some course-related macros. The meat of the document is located in the
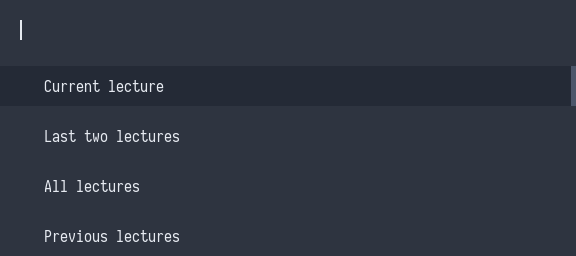
lec_12.texandlec_13.texfiles.As you can see, only the last two lectures are included. I do this because including too many lectures slows down the compilation of my document. Including both the current and the previous lecture strikes the right balance: it makes it easy to have a glance at the material covered in the previous lecture, making transitioning between them smooth, while still retaining fast compilation. To include the notes of all the lectures — for example to make the final pdf — I can press Alt+V and select one of the following options:
Selecting an item or typing a range (e.g. 3-8) updates the contents of master.tex and recompiles my notes.
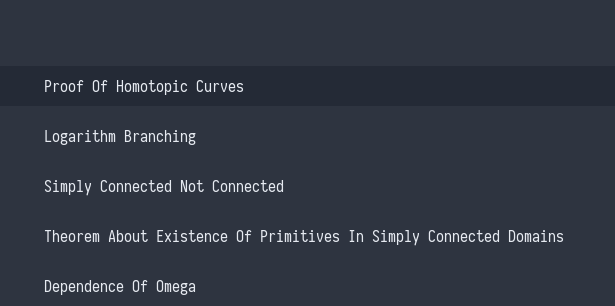
To list all lecture notes, I can press Alt+L. It shows the title, date and week of each lecture, which are all parsed from the LaTeX files.
Selecting a lecture opens it up in Vim. It is worth noting that I always call Vim with the flags
--servername uniand--remote-silentso that every time I open a file using one of my shortcuts, the same Vim window is used. More about that in :help remote.3. Creating a lecture note
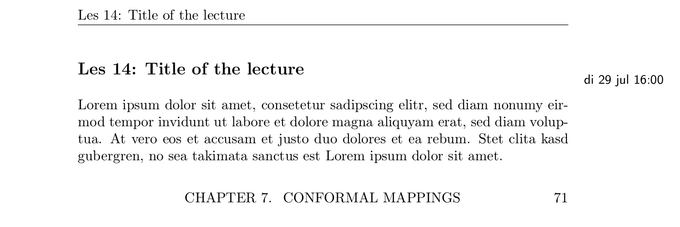
To create a lecture, I can press Ctrl+N. In the case above, this would make a file lec_14.tex in the directory complex-analysis and master.tex would be updated to only include the two most recent lectures. The newly created file has the following contents:
\lecture{14}{di 29 jul 16:00}{Title of the lecture}which, when compiled, looks like this:
The code responsible for this is located in the shared preamble, and goes as follows:
\usepackage{xifthen}
\makeatother
\def\@lecture{}%
\newcommand{\lecture}[3]{
    \ifthenelse{\isempty{#3}}{%
        \def\@lecture{Lecture #1}%
    }{%
        \def\@lecture{Lecture #1: #3}%
    }%
    \subsection*{\@lecture}
    \marginpar{\small\textsf{\mbox{#2}}}
}
\makeatletter
First, the
\lecturemacro stores the third argument in a variable called\@lecture. Depending on whether or not it is empty, it becomes ‘Lecture n: The Title’ or simply ‘Lecture n’. Then it prints the lecture title and it adds the date in the margin. I’ve chosen to save the lecture title in a variable to make it possible to use it in fancy headers. You can see them at the top and bottom in the screenshot above. The configuration goes as follows:\makeatother \usepackage{fancyhdr} \pagestyle{fancy} \fancyhead[RO,LE]{\@lecture} % Right odd, Left even \fancyhead[RE,LO]{} % Right even, Left odd \fancyfoot[RO,LE]{\thepage} % Right odd, Left even \fancyfoot[RE,LO]{} % Right even, Left odd \fancyfoot[C]{\leftmark} % Center \makeatletter4. Figures
As explained in my previous blog post, I draw my figures using Inkscape and the figures directory is where they are stored. To edit one, I can press Alt+F which uses my
inkscape-figurescript to list them:The code responsible for this is simply the following:
inkscape-figures edit ~/university/current_course/figures5. Course dependent snippets
The final item present in all of my course directories is a directory called UltiSnips. It contains course specific snippets, as explained in my first blog post. If I add the following line to my
~/.vimrc,set rtp+=~/university/current-courseUltiSnips also loads snippets located at
current-course/UltiSnips. This way, my snippet setup is split up in two parts. On the one hand, a single file containing commonly used snippets located at~/.vim/UltiSnips, and on the other hand the files located in each course directory containing snippets that are specific to that course.Automatically changing the active course
As mentioned earlier, the active course changes automatically based on my schedule. The script that’s in control for that also shows some relevant information to my status bar, for which I’m using polybar. It turned out to be quite useful, especially knowing what room the next lecture is in.
To give you an idea of what it looks like, here are some examples of what I might see during my day:
You can find my script on Github. The main output is located in the middle of my status bar. Shown on the left there’s a short indicator for the active course. My real status bar also includes plenty of other information that I’ve omitted here for brevity.
Conclusion
In this blog post, I’ve discussed a number of things, all of which somehow contribute to my lecture management: shared preamble, current-course symlink, info.yaml, bundling up and creating lectures, my figure and snippet setup, and my status bar. Altogether they allow for a smooth and efficient note-taking experience.
Liked this blog post? Consider buying me a coffee!
 Written by Gilles Castel, who lives in Belgium, currently pursuing a PhD in pure mathematics at the university of Leuven.
 -
complex-analysis
- university


